Serving Tulsa, Broken Arrow, Bixby, Jenks, Owasso & Sand Springs
completelawncaretulsa.com | (918) 605-4646
How Do I Stop a Sprinkler Head from Leaking at the Base?
A sprinkler head leaking at its base is almost always caused by one of three things: a worn wiper seal inside the head body that lets water escape around the rising stem, a loose or failed threaded connection between the head and the riser fitting below it, or low-head drainage — water flowing through the head by gravity after the zone shuts off, which looks like a leak but is actually a check valve issue. Each has a specific fix, and all three are DIY-friendly repairs for most homeowners. The most important first step is observing when the leak occurs: during the irrigation cycle, immediately after the zone shuts off, or continuously. That timing tells you which cause you are dealing with before you dig anything up.
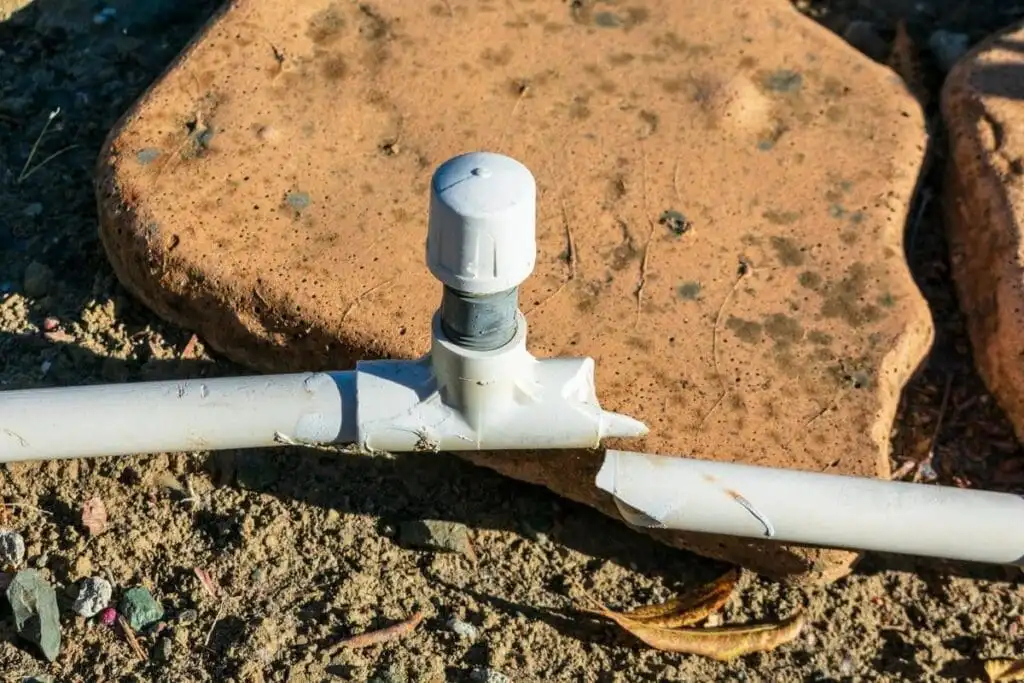
A PVC irrigation tee fitting and riser connection exposed above ground — the most common location for base leaks in Tulsa-area irrigation systems. Water leaking at the junction between the riser and the head body typically indicates a worn wiper seal, a loose threaded connection, or thread damage. A leak at the tee fitting itself (the white PVC junction shown) indicates a cracked fitting or failed cement joint that requires excavation and fitting replacement.
Step 1: Identify When the Leak Is Happening
The timing of the leak is the most useful diagnostic information available before you start digging or disassembling anything:
Leaks during the zone cycle only: Water appears at the base of the head when the zone is running and stops when it shuts off. This is typically a worn wiper seal in the head body. The wiper seal is the rubber gasket that creates a watertight sliding fit around the pop-up stem as it rises and retracts. When this seal wears, water escapes around the stem and pools at the base of the body housing during pressurized operation. The head still functions — it rises, sprays, and retracts — but water bypasses the seal instead of staying inside the body.
Leaks after the cycle ends (low-head drainage): The zone runs normally but water continues to trickle from the base of one or more heads for several minutes to an hour after the controller shuts off the zone. This is not a seal failure — it is gravity-driven drainage. When a zone valve closes, water remaining in the supply pipe drains downhill through the lowest heads on that zone circuit. The water exits through the head's wiper seal gap or check valve (if it has one), and the result looks exactly like a base leak but is actually a drainage issue. The fix is different: adding check valves, not replacing seals.
Leaks between cycles (zone completely off): Water continuously seeps at the head base even when the irrigation system has not run for hours. This indicates either a failed zone valve that is not fully closing (allowing pressurized water to reach the zone and seep through the head) or a cracked fitting or pipe near the head that is weeping groundwater. Both of these are more significant repairs — valve replacement or pipe repair — though both are manageable.
New installation leaks immediately: A newly replaced or newly installed head that leaks at the base right away is almost always a threading problem — either cross-threaded (the head threaded on at an angle, damaging the threads), undertightened (just not snug enough to seal), or over-tightened and cracked (less common with plastic fittings but possible). The fix is removal, inspection, and reinstallation.
Fix 1: Replacing a Worn Wiper Seal (Base Leak During Cycle)
The wiper seal inside a pop-up sprinkler head is not a separately serviceable part on most residential irrigation heads — it is integral to the head body assembly. When the seal fails, the practical fix is replacing the entire head body rather than attempting to source and install a replacement seal. Head bodies for common residential brands — Rainbird, Hunter, Toro — are inexpensive ($3 to $8 for standard pop-up bodies) and widely available at hardware stores and irrigation supply companies throughout the Tulsa area.
The replacement process:
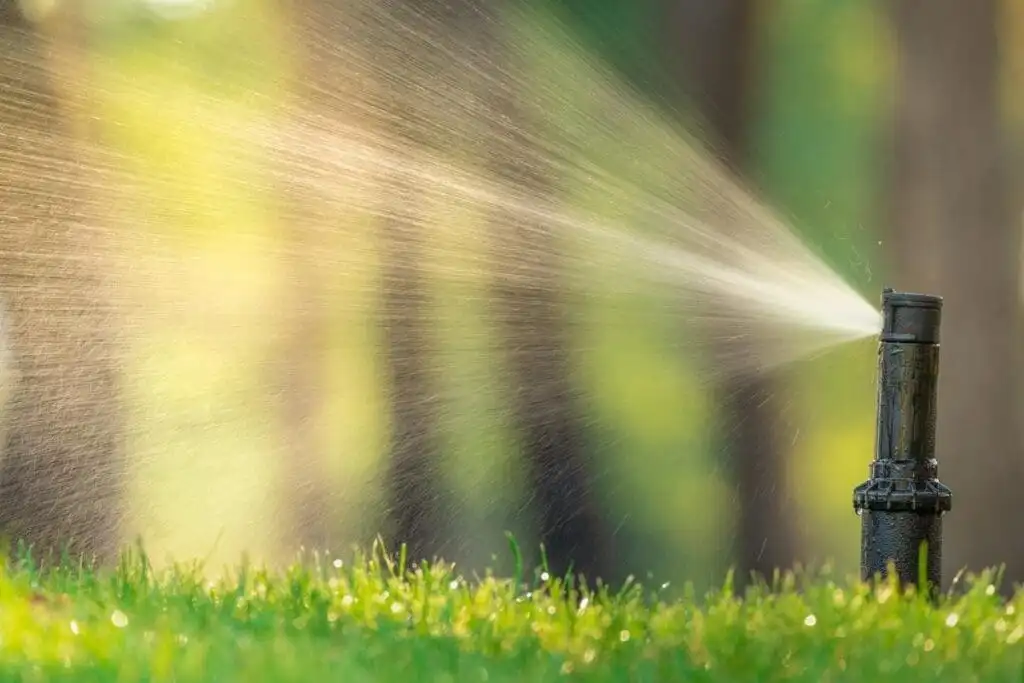
A pop-up rotor head at full rise during an irrigation cycle. When a head like this leaks at its base during operation, water is escaping around the rising stem rather than staying inside the body housing. The wiper seal that creates the sliding seal around the stem is worn or has failed. Replacing the entire head body — a $3-$8 part on most standard residential heads — resolves the leak completely.
Fix 2: Addressing Low-Head Drainage (Leaks After the Cycle)
Low-head drainage is not a head defect — it is a design characteristic of how gravity works on pressurized irrigation pipe. After a zone valve closes, water that remains in the zone pipe drains downhill through the lowest heads on that circuit. The technical term for this is low-head drainage, and it can cause several problems beyond the appearance of a leaking head:
The fix is check valve heads — pop-up heads with a built-in spring-loaded check valve that holds water in the line when the zone shuts off, preventing gravity drainage. Replacing standard heads at the low points of sloped zones with check valve versions is a direct swap using the same riser fitting. The replacement process is identical to a standard head replacement — the check valve is built into the new head body and requires no additional installation steps.
Check valve heads cost slightly more than standard heads ($5 to $15 compared to $3 to $8) but are the correct long-term solution for low-head drainage. Tulsa-area properties with any yard slope — which includes the vast majority of residential lots in Broken Arrow, Bixby, Jenks, and south Tulsa — commonly experience this issue, particularly on zones covering front yard slopes or any turf areas that fall away from the house.
Fix 3: Tightening or Repairing a Loose Riser Connection
Water leaking specifically at the threaded connection between the head body and the riser below it — rather than at the base of the stem inside the body — indicates a seal problem at the joint. This is different from wiper seal failure: the water is escaping at the threaded interface, not around the rising stem.
The diagnosis: with the zone running, look carefully at where the water is originating. A wiper seal leak produces water that appears at the base of the body housing, around the stem. A connection leak produces water that appears at the lower rim of the head body where it meets the riser fitting — the threaded joint itself.
In many cases this is simply an undertightened connection that has loosened over seasons of freeze-thaw cycling, mower vibration, or foot traffic. The fix is removing the head, applying thread tape to the riser threads, and reinstalling snugly. If the leak persists after reinstallation with fresh thread tape, inspect the riser threads for damage. Cracked or stripped riser threads require riser replacement — a repair that involves digging around the riser fitting but is otherwise straightforward on flex riser systems.
On rigid riser systems (PVC pipe risers cut and threaded directly from the zone line), a leaking threaded connection may require cutting out the old riser and installing a new one with a repair coupling. This is a slightly more involved repair that requires PVC cement and correct fitting selection, but remains within DIY capability for most homeowners comfortable with basic plumbing.
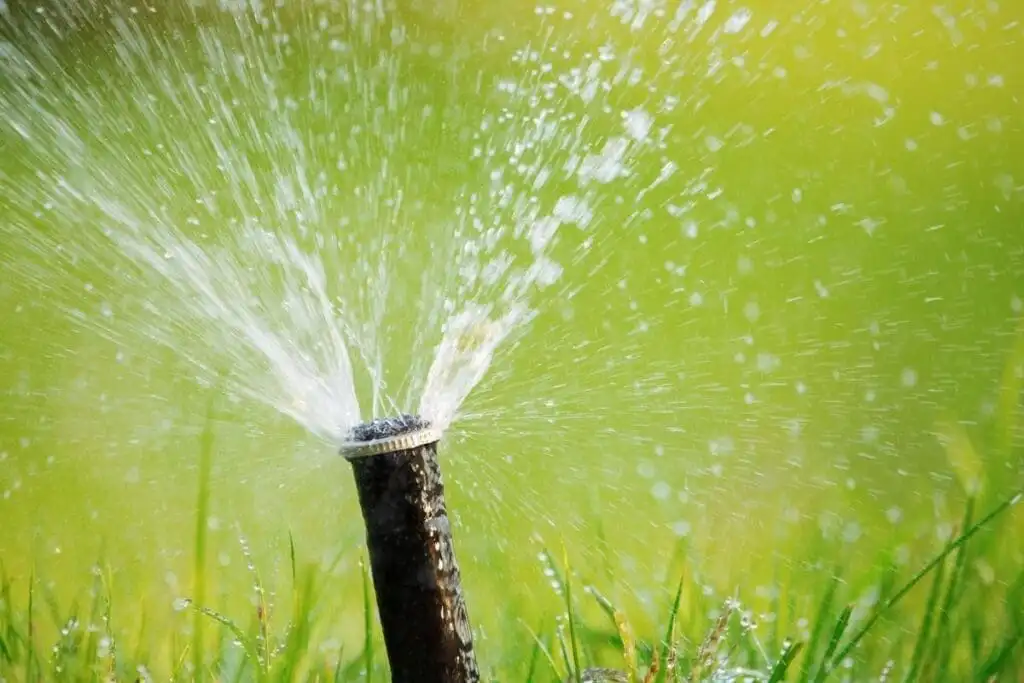
A fixed-spray pop-up head at full extension with a full-circle nozzle pattern — this type of head is commonly used in circular or round bed areas and tight corners where a partial-arc head would waste water on hardscape. When this head type leaks at the base during operation, the cause is almost always the wiper seal inside the body housing. Replacement takes less than five minutes with no tools other than a pair of hands.
Fix 4: Cracked Fittings or Pipe Near the Head
If removing and reinstalling the head does not stop the leak, and the riser threads are in good condition, the source may be deeper — a cracked PVC tee fitting, a failed cement joint, or a pipe crack near the riser connection point. These are not visible without digging around the head, but they produce unmistakable symptoms: water that continues to seep at the head location even when the zone is completely off, or water volume at the head that seems disproportionate to what a seal or connection leak would produce.
The repair for a cracked PVC fitting requires excavating around the head and riser to expose the zone line, cutting out the damaged fitting or pipe section, and installing a repair fitting with PVC cement. On flex riser systems, the flex pipe can usually be disconnected from the zone line tee and redirected to a new tee fitting without replacing the riser itself. On rigid PVC systems, the repair requires cutting the line on both sides of the damaged section and installing a repair coupling — a standard plumbing repair that any irrigation professional handles routinely.
Cracked fittings near heads are more common in Tulsa-area systems that have experienced freeze events without proper winterization. PVC becomes brittle with age and the expansion of ice in unfilled pipe cracks fittings and tee connections — often in the buried section just below the frost depth where movement is highest. Annual winterization — purging the system with compressed air before hard freezes — is the most effective prevention for this type of failure.
Base Leak Diagnosis at a Glance
Matching the symptom to the solution:
Oklahoma-Specific Considerations: Hard Water and Freeze Cycles
Two factors specific to the Tulsa metro area accelerate the seal and fitting wear that causes base leaks in residential irrigation systems.
Tulsa area water runs moderately hard due to the limestone and dolomite geology of the Illinois River and Verdigris River watersheds that supply the region. Over seasons of irrigation use, mineral scale accumulates inside head bodies and on wiper seals, gradually degrading the seal surface and reducing its effectiveness. Hard water mineral buildup also forms on threads, making connections harder to break loose during repairs and increasing the risk of cross-threading on reinstallation. Annual inspection and cleaning of irrigation heads — particularly flushing mineral scale from inlet screens and nozzles — helps extend seal life.
Oklahoma's freeze-thaw cycles are more severe than many homeowners realize. Tulsa area temperatures reliably drop below 20 degrees Fahrenheit several times each winter, and occasional arctic events push temperatures to single digits. The expansion of water as it freezes inside irrigation components exerts enormous pressure — enough to crack PVC fittings, split head bodies, and fracture rigid risers. Systems that are not properly winterized before the first hard freeze of the season develop leaks the following spring that trace directly to freeze damage. Complete Lawn Care's irrigation service team provides winterization services throughout the Tulsa metro area specifically to prevent this failure mode.
When to Call for Professional Irrigation Service
Most base leaks are genuinely DIY-friendly repairs. These situations are worth having a professional look at:
Irrigation Repair and Maintenance Throughout the Tulsa Area
Complete Lawn Care provides irrigation repair, maintenance, and seasonal service throughout Tulsa, Broken Arrow, Bixby, Jenks, Owasso, and Sand Springs. Our irrigation service team handles the full range of sprinkler system issues — from a single leaking head to zone valve replacement, broken pipe repair, winterization, and spring startup inspections.
With over 25 years serving the Tulsa metro area, we understand the specific challenges Oklahoma's hard water, clay soil movement, and harsh freeze-thaw cycles create for residential irrigation systems. We service all major residential brands and bring the same intentional, science-based approach to irrigation service that we apply to every aspect of lawn care.
Our agronomy-supported programs are continually refined based on real-world results — because an irrigation system that is wasting water through leaking heads or delivering it unevenly is directly limiting the results of every fertilization and lawn care application we make throughout the season.
Sprinkler System Leaking or Not Performing Right?
Contact Complete Lawn Care at completelawncaretulsa.com or call (918) 605-4646. We will diagnose what is causing the problem and fix it the right way.
Experience. Science. Intentional Lawn Care — That’s the Complete Lawn Care Difference.